Printable Logic Puzzles for Adults: A Route-Solving Guide
To solve a printable route logic puzzle, separate two questions: which cells must the trail use, and which connections join those cells? Row and column totals help answer the first question. A single unbroken route from start to finish answers the second. Correct totals alone do not prove that the route works.
This guide uses an original miniature puzzle you can copy onto paper. It teaches the rules used in One Quiet Trail, without revealing any of the collection’s paid map answers. Other route-puzzle collections may use different rules, so read their instructions before applying the method.
Count cells rather than steps
In this rule set, draw through cell centers, moving up, down, left or right. Diagonal moves are not allowed. The number beside a row or column gives its exact total of used cells, not the number of line segments or turns.
S and F count. Start, finish and required diamond waymarks each occupy one used cell. A line through three cells uses three cells even though it makes only two moves. A blocked square marked X cannot be used; unmarked squares may also need to stay empty.
S and F each need one connection. Every other used cell needs exactly two. The final drawing must be one continuous S-to-F trail with no repeated cell, branch, crossing or separate loop.
Try a free miniature route puzzle
Copy this three-by-three grid. Letters label columns and numbers label rows, so A2 means column A, row 2. Numbers in parentheses are the required totals. S is A1, F is C1, B3 is a required waymark, and C3 is blocked. This new example is separate from the product’s teaching trail and 12 maps.
| Row and total | A (3) | B (2) | C (2) |
|---|---|---|---|
| 1 (2) | S | Empty | F |
| 2 (3) | Empty | Empty | Empty |
| 3 (2) | Empty | Waymark | X |
“Empty” means initially unmarked, not forbidden. Before reading the answer, identify the used cells without drawing their connections. A small dot can mean “must use” and a light slash “leave out.” Keep those notes distinct from the printed X.
First establish the used cells
- Row 1 needs two. S and F already supply both, so B1 stays unused.
- Row 2 needs three. All three cells in that row must be used.
- Column A needs three. A1, A2 and A3 must all be used.
- Check the rest. B3 is the required waymark. Column B uses B2 and B3; column C uses C1 and C2. Row 3 uses A3 and B3. Every total now fits.
Then choose the connections
S at A1 can connect only to A2 because B1 is unused. F at C1 can connect only to C2. A3 needs two connections and has only A2 and B3 available, so both are necessary. B3 must also connect to B2 because C3 is blocked.
A2 now has its two connections, to A1 and A3. It must not connect to B2, even though both cells are used. B2 instead connects to C2, completing the route.
Answer: A1 → A2 → A3 → B3 → B2 → C2 → C1. Trace it once from S to F, then recount the rows and columns. The route uses seven cells and six moves. A2 and B2 touch, but are not joined.
Use the same checks on a larger map
Look for a row or column whose total is already satisfied; its remaining undecided cells must stay unused. If every available cell is needed to reach a total, mark them used. Revisit crossing rows and columns after each deduction.
Next inspect connections. An endpoint with one possible neighbor has a forced exit. An ordinary used cell with exactly two possible neighbors needs both. Avoid closing a loop or arriving at F while required cells remain disconnected.
If no immediate deduction appears, choose a small what-if question. Mark the tentative connection lightly and follow its consequences. Reject it if it exceeds a count, strands a required cell or breaks a connection rule. Undo the whole trial, not just its last line. A possibility becomes proven only when the alternatives have been ruled out.
Pause before the page becomes a tangle
If you lose track, stop adding lines. Recount one row and its intersecting columns, then identify the last change you can justify. You can use a hint, erase a trial or return later. Solving is untimed; a larger grid is not a reliable promise of a particular difficulty or duration.
With a partner, let one person propose a move and explain why, while the other checks it. Swap after the deduction.
Prepare your first One Quiet Trail session
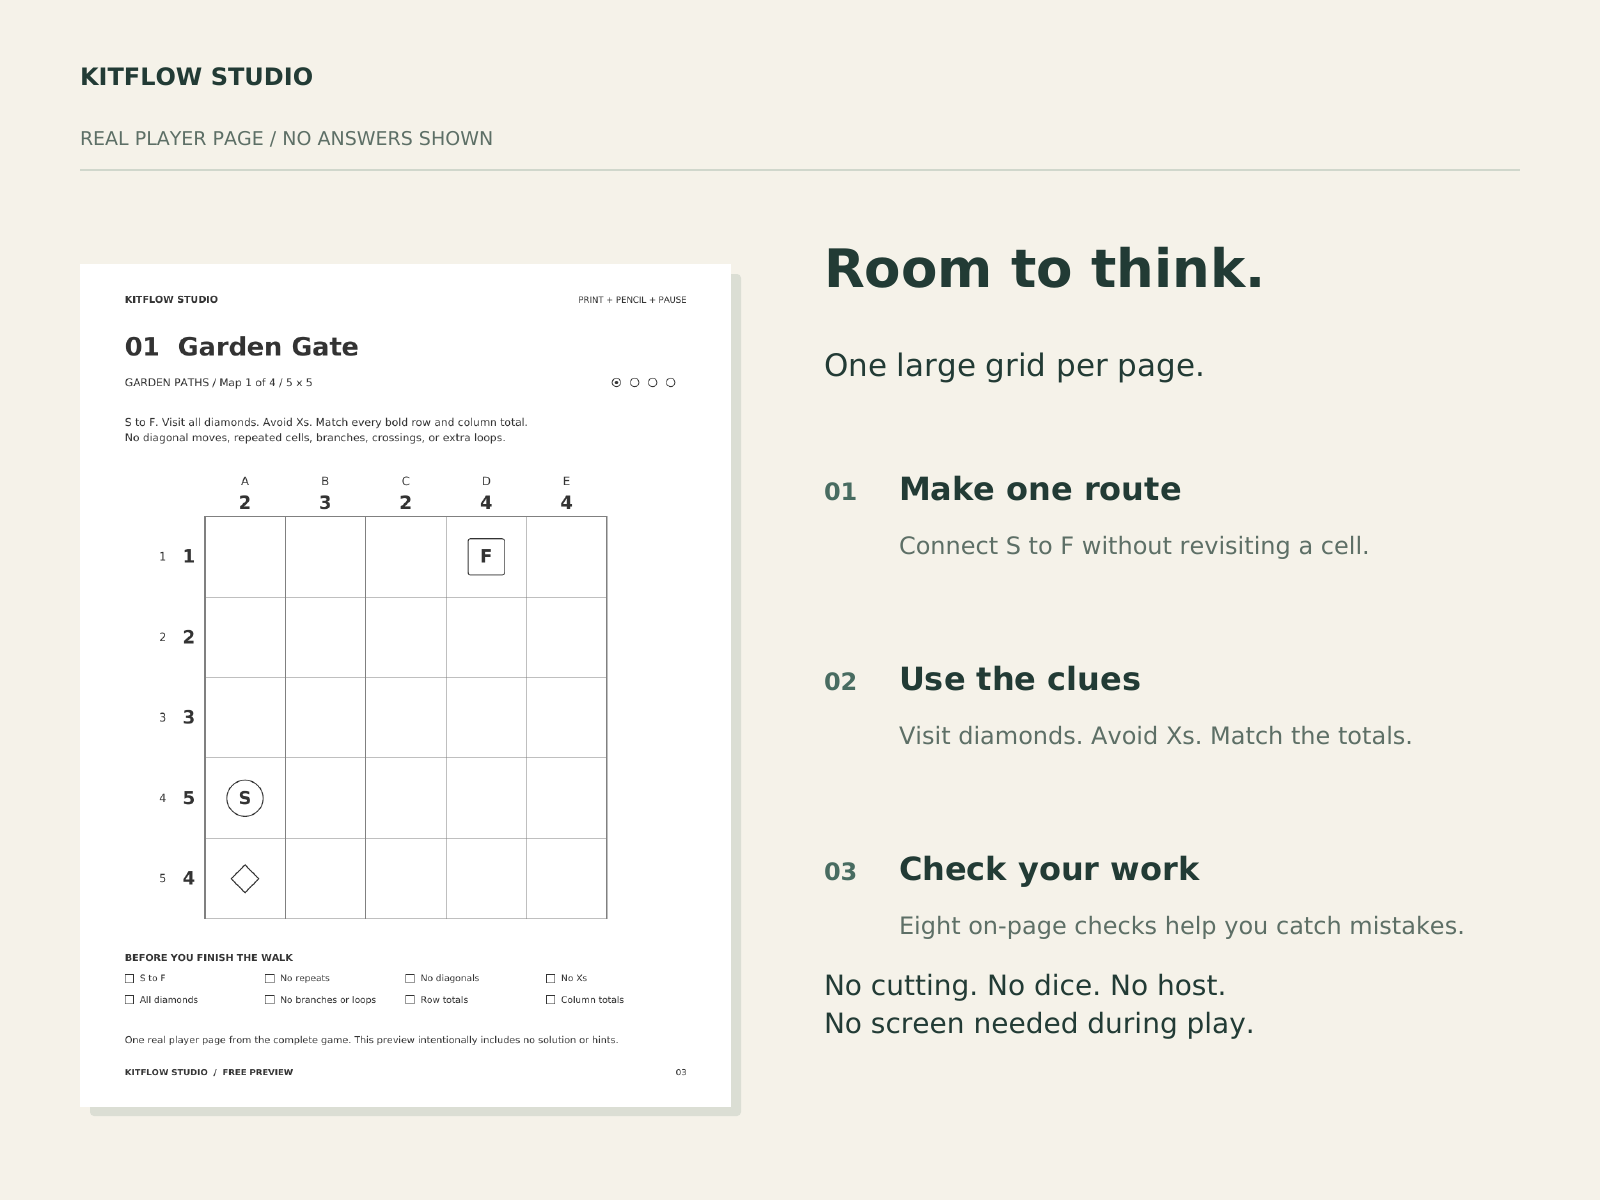
One Quiet Trail contains 12 fixed-solution maps: four each at 5 × 5, 6 × 6 and 7 × 7. Its A4 and US Letter PDFs are 26 pages each and contain the same maps, not 24 different puzzles.
For a first session, choose your paper size and print pages 2–5, four sheets: the picture guide, two teaching pages and map 01. Use portrait, black-and-white, single-sided printing at Actual Size / 100%; use Fit if an edge clips, not borderless printing. Bring a pencil and eraser. Cover the right-hand answer grid on teaching page 4 until you want to check.
Page 18 offers an optional guided start. Keep hints on pages 19–22 and answers on pages 23–26 separate. Later sessions need only the chosen map and any help you want. No cutting, host, app or internet is required during play.
The intended audience is teens and adults; new solvers around age 10 need adult guidance. Hints explain starting steps, not every move. Reprinting revisits the same fixed maps. No human playtesting or physical printer testing has been completed, and there is no promised solve time. The fictional maps are for seated puzzling, never driving or navigation.
See the real layout and unsolved preview images on the product page before deciding. The gallery contains no paid hints or answers.
For a larger shared-solving session, see our guide to a quiet cooperative card game night for 2 to 4.